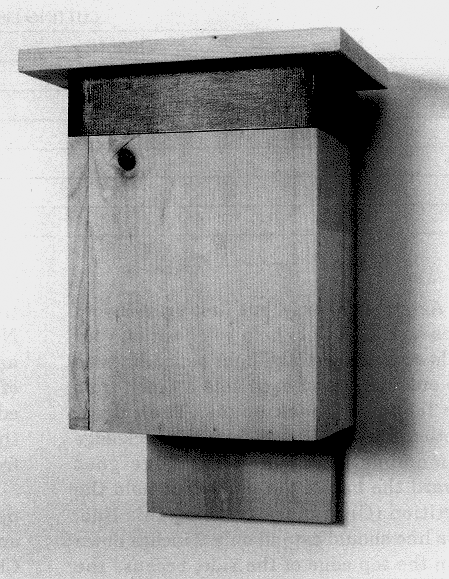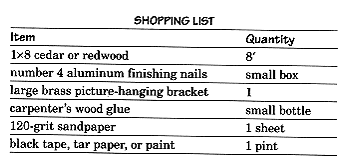
Make a place for bats in your backyard. Build a roosting box for them with this easy-to-follow free woodworking plan. Only a few basic tools are needed.
There’s a lot of misinformation about bats. Many people think they’re dangerous critters, but actually, bats are one of man’s best friends because they eat mosquitoes and other pesky insects.
To attract bats to your backyard, make a roosting box or bat house and hang it on a tree or on your house. The box works best if it is positioned about 12 to 15 feet high. If possible, put it on the east side of the tree or house so that it will receive the morning sun but be shaded during the afternoon. Bats seem to take up residence in boxes that are protected from the wind.
The bat roosting box is easy to build using pine boards. It is designed with partitions or walls inside, which the bats attach themselves to. If the partitions are smooth, roughen them up with a chisel or saw cuts so that the bats can climb on them. Some bat experts suggest putting a band of black tape, tar paper, or paint on the front and side surfaces to attract bats to the box.
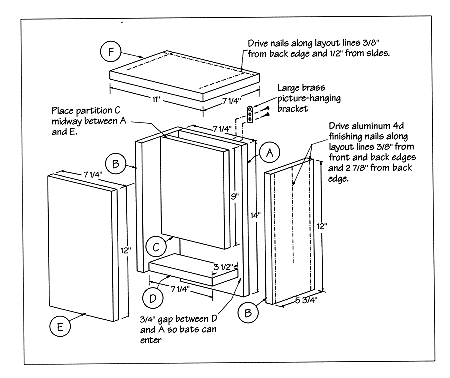
To build the bat roosting box, begin by cutting the parts to length. All the parts are cut from lx8 lumber. After you have cut the parts to length, trim the sides (B) so that they are 53/4 inches wide. When you assemble the house, put the edge with the saw marks facing the back of the bat house.

Assembly is easy, but first, draw layout lines on the sides to help you position your nails accurately. Make light pencil lines on the outside face of each side 3/8 inch from the front and back edges. Then draw another line 2 7/8 inches from the back edge (remember that the rough edge goes toward the back); the nails that hold the partition © in place go along this line. This line should extend only 9 inches down from the top edge of the side, because the partition will not run the full length of the side.

Drive five evenly spaced number 4 aluminum finishing nails along each of the longer lines and four evenly spaced nails along each of the shorter lines. Pound the nails into the wood just deep enough so their points emerge from the other side. Put some glue on the edge of the back (A), and then place a side against it. Carefully align the parts at the top, then drive the nails through the side into the edge of the back.
Next, put glue on the edge of the partition and place it in alignment with the center set of nails. Check that it is flush with the top edge of the side, and then drive the nails through the side into its edge. Install the front (E) in the same way.
Turn the unit over and apply glue to the upward-facing edges of the back, partition, and front, and nail the second side in place. Check alignment at the top and make sure that the partition is in alignment with the nails. Put the bottom (D) in place, and secure it with nails driven through the front and side into its edge.

The top (F) is glued and nailed in place with its back edge flush with the back piece (A). First, draw nail layout lines on the top piece 3/8 inch from its back edge and 11/2 inches from its sides. Then drive five evenly spaced nails along the back line and four nails along each side line just deep enough so their points emerge from the other side. Apply glue to the top edges of the house assembly, and nail the roof in place.
You can stain the house with any outdoor-type stain, but we don’t recommend painting it because paint will eventually peel. We gave our house a coating of water seal and left it natural. Install a large brass picture hanger on the back of the bat house, and it’s ready for tenants.
TIME REQUIRED: Four hours for cutting, building, and assembling, plus drying time for glue and finish.
Here are some other helpful guides:
